
Fancy Pants Shrimp Dip with Tsar Nicoulai Salmon Roe & Schär Gluten Free Bread

Are you looking for a Memorial Day recipe to bring to a party and show off how fancy you are, but don’t want to put a lot of effort into it? I’ve got you covered with a recipe I put together last night in collaboration with Tsar Nicoulai Caviar and Schär Gluten Free Bread!
Fancy Pants Shrimp Dip with Tsar Nicoulai Salmon Roe
Recipe by Kristy Harris
6 wedges Laughing Cow Light Wedges
3 Tbs Kraft Mayo with Avocado Oil Reduced Fat Mayonnaise
1-2 Tbs 0% Chobani Greek Yogurt (drained)
3 Tbs lemon juice
Zest of 1/2 lemon
3/4 pound cooked shrimp of your choice
(weight with shells and tails removed… you can even use salad shrimp if you like)
1/4 cup scallions
2 Tbs parsley
2 tsp garlic powder
Method: Pulse all ingredients in a food processor (I start with the laughing cow, the mayo, and yogurt and then add the rest of the items) until the mixture comes together and can be spooned out (or piped out of pastry bag if you want to get even MORE fancy pants–you’ll pulse the shrimp dip further, however, I like to see little chunks of shrimp in mine).
Spread onto Bread/Toast/Crackers/Cucumber
*Eat with a Spoon out of the Food Processor Vessel standing up in your kitchen = whatever is your “conveyor belt” to your mouth of choice. 😛
I used a duo of “breads” on this plate. A slice of Schär Gluten free sourdough I toasted in the air fryer, as well as some Protein Sparing Bread (I make for myself) that contains 0 carbs.
Topping: Top each bread and spread with a 2-3 tsp of Tsar Nicoulai Salmon Roe.
I had a 2 ounce jar, so you could get a 1 ounce jar and use the whole thing, but I snacked on some while I was preparing the dip. 😉
Tip: (If you want the ULTIMATE fancy, you can use one of their caviar products!) Serve with a bottle of Domaine Carneros Brut Rosé, or be the fanciest with a bottle of Le Rêve Rosé! Cheers and Happy Cooking!
Entire recipe (serves 6-8) Approximate Macros: 641 calories: 30g carbs 25g fat, 74g protein
Per serving: 107 calories: 5 carbs, 4g fat 12g protein
Gluten Free Breakfast Pizza with Sweet Potato Crust
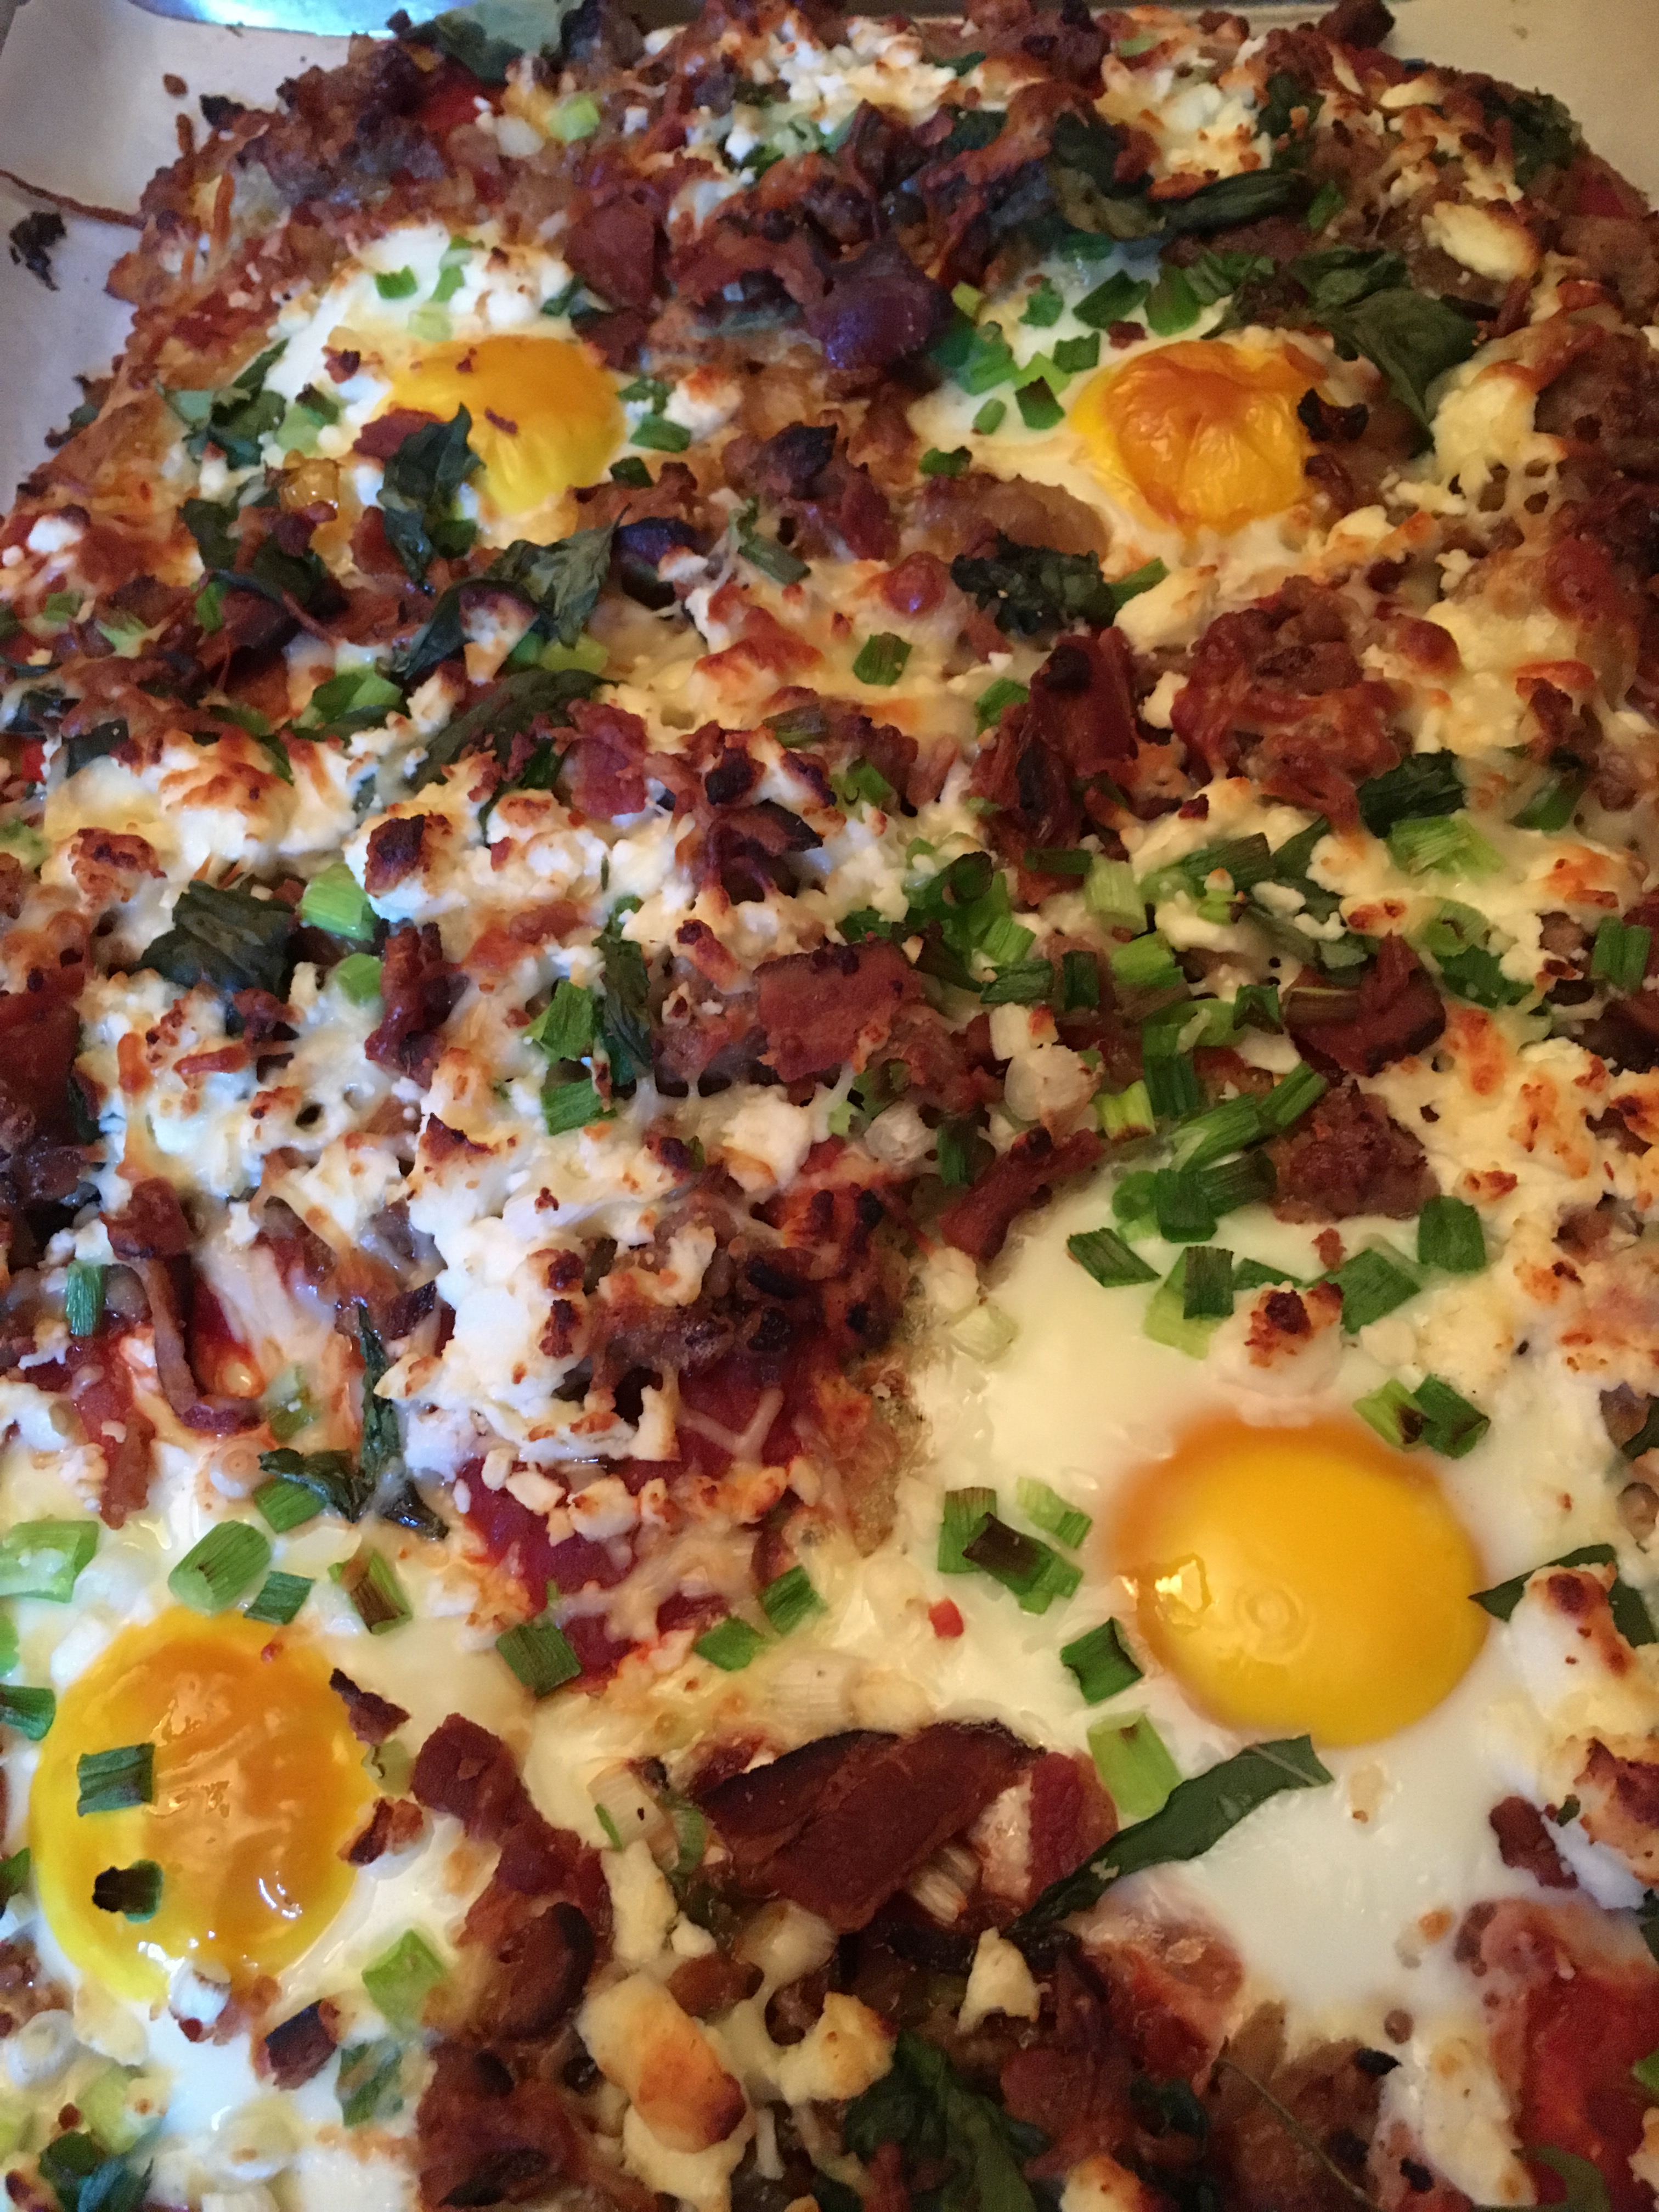
One of the things I miss the most being on a Paleo/Primal diet is BREAD. In that category would also be a nice, not too thin pizza crust that I have never been able to replicate with cauliflower. I also wanted to be able to PICK UP the slice of pizza and not have to use a utensil. A lot of gluten free pizza recipes require and knife and fork and leave me feeling like I am eating some sort of soggy polenta dish with tomato and cheese on top.
I finally came up with a ratio/blend of ingredients that make a great gluten free crust, and I will probably never make a cauliflower crust again. I felt confident enough about the crust recipe’s texture and flavor that I made it at the 2017 California State Fair Cooking Demo on the last morning of the fair. Try for yourself, and use the following crust recipe as a base for any kind of pizza you want to make. I am posting the exact recipe below that I made at the California State Fair. 🙂
PS: You’ll need a food processor, 3 sheet pans (at least 9 by 13) a cook top of some kind, and an oven to make this! (Just throwing that out there!) For the oven, place one rack in the middle and one nearer to the top.
Crust Ingredients:
2 large sweet potatoes (you can use orange or white, whatever you prefer)
1 1/4 cup nut flour of your choice (I used a ground pistachio/almond blend)
3 eggs
3/4 cup grated parmesan cheese
1/4 water
1/4 cup olive oil
1/2 Tbs garlic powder
1/2 Tbs dried oregano
1/2 tsp sea salt

Step One
Peel and cut your sweet potatoes into roughly 1-2 inch squares and pre-cook them. You can do this any way you want, but I would stay away from boiling them because this will leave them waterlogged and soggy. My shortcut is the microwave. Cook them until they will mush between your fingers with almost no effort. You can also bake them if you want. Tip: Cook potatoes the night before, or even a few days before to shave a little bit off your pizza prep time.
Step Two
If you are making the breakfast pizza, this is the part where I go ahead and PREHEAT the oven and cook my bacon for the topping at the same time. Even if you’re not making the breakfast version, SURELY you’ll want bacon on your pizza anyway! 🙂 This is an easy way to get the bacon super crispy without burning it. I use a sheet pan lined with parchment paper to cook the bacon. While you’re at, go ahead and line THREE sheet pans with parchment paper. Two you will need for the pizza crust, so parchment paper line them and set them aside for now. The remaining pan will get a layer of parchment and then your 6-10 slices of bacon. Don’t crowd the pan too much, or the bacon won’t cook evenly and it won’t render (get crispy). Once you’ve put the bacon on the sheet pan, place it in the oven and THEN turn the oven on. Heat it to 400°F. You’ll want to cook the bacon slow, so a cold oven is OK to begin with. By the time you’re ready to put your crust in the oven, your bacon will be almost ready and your oven will be the temp you need it. Now on to the crust!
Step Three
Grind the nuts of your choice (I used a mixture of pistachios and almonds–1 cup ground pistachios, 1/4 cup ground almonds) until they look like coarse sand/start sticking to the sides of the food processor bowl (we don’t want nut butter, just finely ground). Pulse in your parmesan cheese. Add the salt, garlic powder and the dried oregano. Then begin adding your sweet potatoes in stages. You will need to add the water, olive oil, and 3 eggs in between adding the potato pieces so that the mixture continues to blend well. Depending on the size of the potatoes, you might not need to add all of them. Consistency-wise you are looking for a thin cookie dough, but thick cake batter. It won’t be the consistency of pizza dough from a pizza parlor, it will be more loose than that.
Step Four
Spread the dough mixture onto the other parchment-lined pan. Spread evenly across the pan, no thinner than a 1/2 inch thick. At this time, you can check your bacon. It may or may not be done depending on the thickness of the bacon slices. If it is not done, you can leave it in on the top rack and set the timer to remind you to check it (I go in 5 minute increments). Also, make sure to pour any excess grease off of the pan. Pour the grease into a coffee cup or something you can retrieve it from for later use (I will get to that later!) Place the dough pan on the middle rack and bake for 10-12 minutes.
Sauce Ingredients:
15 oz can crushed tomatoes
3 Tbs tomato paste
1 Tbs chopped garlic
2 Tbs chopped fresh oregano
1/3 cup chopped fresh basil
1/2 tsp salt
Step Five
If you want, you can buy a jar of pizza sauce and skip this step all together. I do this when I am pressed for time. If not, add your crushed tomatoes, paste, and herbs and salt to a saucepan and cook together while the pizza crust does it’s first bake for the 10-12 minutes. You will be simmering the sauce until you need to use it. Also, the bacon should be getting done by now, so check it again and take it out if necessary.
Sausage and Shallots Preparation Ingredients:
2 shallots
Reserved bacon grease
1 lb ground turkey
Step Six
While the sauce is cooking and crust is baking, dice up the shallots. Then, in another saucepan separate from the one you used for the tomato sauce, pour some of the bacon grease you reserved from earlier, heat it up, and sauté the shallots until they are translucent. Add the ground sausage (turkey or pork, whatever your preference) and cook with the shallots, allowing the meat to cook through and brown. When the meat is browned, turn off the heat and set aside. At this point, the first bake of the crust is probably done, so go ahead and take out the crust and place the pan on a heat safe surface.
Step Seven
At this point, fetch the third parchment lined pan, and invert it, making sure the parchment paper stays put. Place it on the top of the crust and flip it over. This is so the pizza crust will cook through/dry out, and you will be able to pick up the pizza/not eat with a fork! Your oven should still be at 400°F. If you are making the breakfast pizza, this is the part where you will peel the parchment off the top of the crust, use the back of a spoon and make little “wells” on the pizza. I make 4 wells for 4 eggs. The wells I am describing are little indentations so that when you crack the egg on the pizza crust, it will not run all over the top. Instead, it will be captured in the little bowl you made for it. Once you have made the wells and cracked the eggs into them, carefully place the crust into the oven for another 10 minutes. This time, use the rack that is higher in the oven, so the eggs will set.
Toppings:
1 bunch green onions
½ cup sun dried tomatoes
6-10 slices bacon
2 cups grated mozzarella cheese
Step Eight
OK, we’re almost done! For final prep, chop the green onions and set aside. Also, chop the bacon you prepped earlier and set aside. I also like to measure out the sun dried tomatoes and the cheese and put everything in a row (so I don’t leave anything out). It’s like a little pizza assembly line. 🙂
Step Nine
Take the crust out (the eggs on top should be almost set). Turn the oven temp up to broil (low), you will need to use the oven one last time after you top the pizza (so that the cheese will melt). Begin with the tomato sauce and spread around the crust, being careful to avoid the eggs on top. Then add the sausage, bacon, sun dried tomatoes, green onions, and top with the mozzarella cheese. You should still be able to see the eggs through the toppings.
Step Ten
Place the pizza back in the oven until the cheese on top melts and browns. I like to keep an eye on the pizza through the window on the door of the oven to prevent over-browning. Once the cheese on top is melted, take the pizza out, allow to cool 5-10 minutes before cutting. This is the part where I set the table. By the time I am finished setting the table, the pizza is ready to cut and serve!
Did I leave out anything? Do you have questions? Contact me here!
For other adventures in gluten free pizza, you can click here and here. There’s even here.
If you don’t already, please follow me on Facebook here, on Twitter here, and on Instagram here. Thank you, and please enjoy the recipe! 🙂
Grocery Outlet’s Spring Wine Sale Starts This Tuesday, March 22nd!

OK wine lovers! Grocery Outlet is holding a huge wine sale where all wines will be an additional 20% off Grocery Outlet’s everyday low prices. It’s the same high-quality wines you love at 50-70% off PLUS 20% more off, so that means you can save as much as 80% on all Grocery Outlet wines during the sale!!
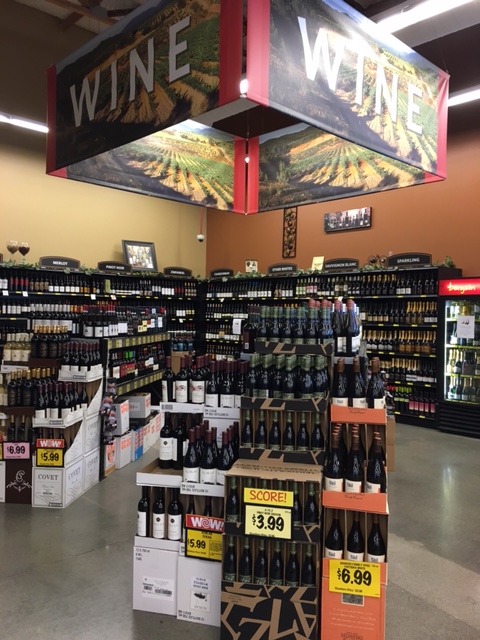
Yesterday I visited my local Grocery Outlet in Roseville, CA, and spoke to the wine buyer, Michael, about the upcoming sale. He thought my blog cavegrrl referred to wine caves! I never thought of that. That’s actually pretty brilliant. Hmmmm…maybe someday I will rebrand AGAIN as a wine blog with the same URL! Anyway, he was incredibly nice to share about an hour of his time with me. He is passionate about making sure he finds wines customers are going to love. He has a “benchmark varietal” method in which he asks the customer what their favorite varietal is, and if they aren’t sure of that, he finds out something as simple as their preference for red or white wine. Through this process, Michael figures out the customer’s preference of sweet or dry, and eventually can help them pick a wine he believes they will enjoy.
It is that kind of customer service you can get, especially at this Grocery Outlet location, where it’s almost like having your own sommelier, but in a discount grocery store (kind of awesome). And truly, since my visit today, I can tell you there are some really great wines to choose from for the sale coming on Tuesday!
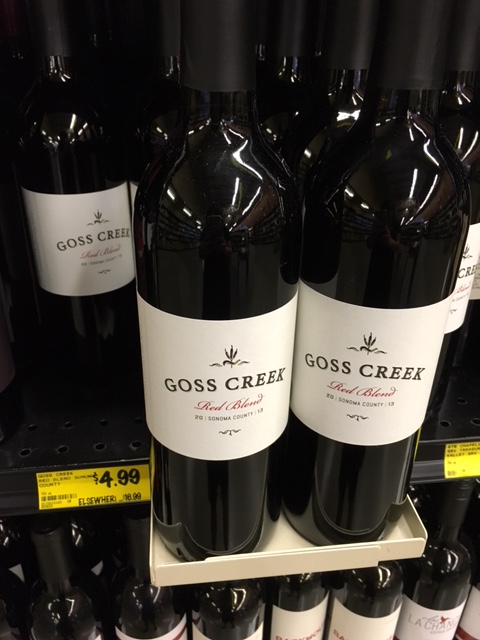
Here’s the lineup I bought today and (all of them I highly recommend):
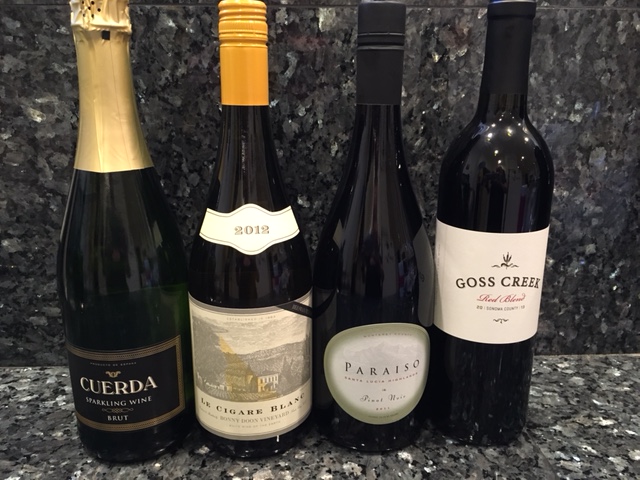
From left to right, Cuerda Sparkling Wine ($4.99)–tastes like an $8-$10 bottle and perfect for unwinding after a busy day or blending in a mimosa or bellini, Bonny Doon Le Cigare Blanc ($8.99)-I will update the description when I try this one, but Randall Graham is behind this one, so I think it will be pretty good. Also, it’s a white wine blend with Roussane, so I am sure I will be a fan. Next is the Paraiso Pinot Noir ($5.99)-a bargain and goes for $24.99 per bottle elsewhere, by the way does Santa Lucia Highlands ring a bell?? You should have seen me try to contain myself with this deal!! Finally, there’s Goss Creek Red Blend ($4.99)-I really loved, tastes like a $15-18 bottle and goes for $16.99 per bottle elsewhere.

Not only is Grocery Outlet a great place to buy wine, it’s a great place to find food to pair with your wine! Today, I bought a bag of Brussels sprouts, an onion, and some Aidell meatballs to throw together a simple and tasty dish!
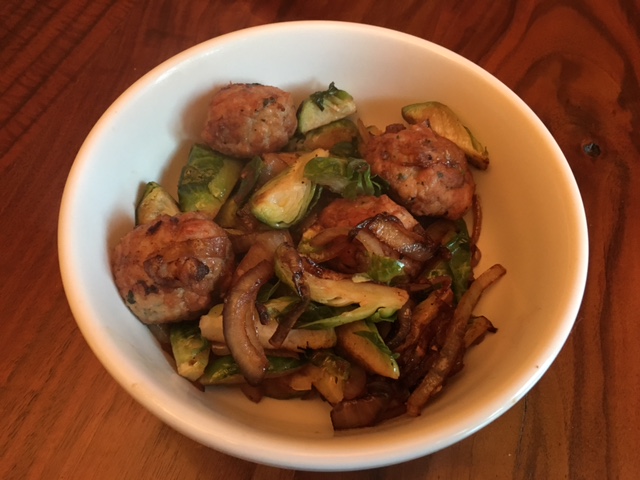
Brussel Sprout, Onion and Meatball Sauté:
1 onion
1 small package Brussels sprouts (quartered and pre-cooked in Microwave for 3-4 minutes)
Balsamic Vinegar
1 package Aidells meatballs
salt
olive oil
All you have to do is slice the onion, saute it in olive oil with some salt until translucent, then add the Brussels sprouts––I like to quarter them first and then microwave them for 3-4 minutes to get ahead of the game. Usually, I am tired at the end of the day and I just want to eat and relax, so I am looking for any shortcut possible.
After the onions get browned and are pretty well cooked, add some balsamic vinegar to your liking (2-3 Tbs for me), and then add the microwaved Brussels sprouts and sauté them until browned. Then add the Aidell’s sausages. Cook the entire thing until it’s heated through (the Aidell’s are already pre-cooked, you just have to warm them up in the pan. It literally takes less than 20 minutes to make this dish and it’s a great pairing with ANY of the wines I bought above (especially the Paraiso Pinot Noir!!)
You bet I will be back in the store at 8am on Tuesday to clear out my favorite wines and save an extra 20% off when the wine sale begins! If you love wine, do yourself a favor and visit your local GO March 22-26th!! If you have questions, don’t hesitate to ask the wine buyer (if that person is present) or the store manager. In my personal experience (I was a customer before I was compensated for this blog post) and the following held true: the management team at Grocery Outlet just wants you to find the right wine for you and for you to be happy with your purchase.
You can find Grocery Outlet on Facebook here, on Twitter here and on Instagram here.
Join the fun on social media by tagging your posts with #GOWineSale!! Cheers and happy shopping!!
Mason Partak Takes the Challenge Cream Cheese Challenge

A few weeks ago when I interviewed Mason Partak about his Chopped Junior experience and some of his future plans, I asked him to participate in a little something I call the Challenge Cream Cheese Challenge.
See, Challenge Butter (and Cream Cheese) sponsored my cookie exchange last year and sent me coupons for more butter and cream cheese than I could ever possibly use. Of course, the butter coupons I made very good use of and currently have about 15 pounds of butter in my freezer. However, cream cheese is not primal or paleo, so I sent the remainder of my cream cheese coupons to Mason Partak and asked him to come up with a recipe that I could publish on my website.
He gladly accepted the challenge, as he is such a great sport and takes advantage of most opportunities that come his way. I present to you his recipe for the Challenge Cream Cheese Challenge:

Challenge Cream Cheese Balls
2 pkg Challenge cream cheese
1 med yellow onion
1 sm red onion
1 lg head of garlic
6 sage leaves
2 springs of Rosemary
1 pkg chives
1 C Italian blend grated cheese
1.5 C fresh grated parmesan
1 C chopped or sliced nuts (we used almonds)
Olive oil
Salt and pepper
Preheat the oven to 400°F. Quarter the onions and top the head of garlic. Create a wrap around the garlic with foil so it sits up, it does not have to be closed up. Drizzle the onions and garlic with olive oil and sprinkle with salt and pepper. Roast until soft. Set aside and let cool. Once cool, squeeze the garlic cloves out of their casings. Isn’t itway fun how they pop right out?
Finely dice the chives and place them in a bowl, set aside. Dice the sage leaves and Rosemary. Once your roast onions and garlic are cool (don’t have to be cold, just not hot), place them in the food processor and pulse until they are almost a paste consistency – not quite though. Add the cream cheese, Italian blend, 1/2C parmesan, sage and rosemary and process unit it is all completely mixed. Taste and add salt and pepper to taste. You may need to scrape your food processor bowl and mix again to be sure you don’t have cream cheese lumps. Turn the whole thing out on to a cookie sheet being sure to scrape all the cheesy goodness out of your processor.
Form the cheese into four logs or balls and roll in the chives. When you start to run out of the chives, add the other cup of parmesan and coat with that. Do the same with nuts if you want. Refrigerate for 30 minutes before serving.
Serve with a French baguette and crackers, it’s delicious!
Mason says if you have leftovers, it adds a delicious layer of flavor to casseroles. The Partaks have also added it to their white chicken chili, it was so good!
Thanks so much for the recipe, Mason! I will be following up next week at some point with my stuffed sweet potatoes (also featuring Challenge Cream Cheese). You can find Mason Partak online here, on Facebook here and follow him on Twitter here and on Instagram here.
Farm-to-Fork Pear Bridge Dinner on the Delta September 27th at 4pm

If you didn’t get tickets to the Tower Bridge Farm-to-Fork Gala dinner, I have an alternate dinner (also on a bridge!) for you to attend at the same date and time!
On September 27 at 4 pm, a dinner coordinated by the California Pear Advisory Board will take place on the historically-named Dead Horse Island Bridge on the Delta near the community of Walnut Grove. Attendees will mingle with other guests and local California pear farmers while enjoying a scenic view in the heart of one of the largest pear-growing regions in California.
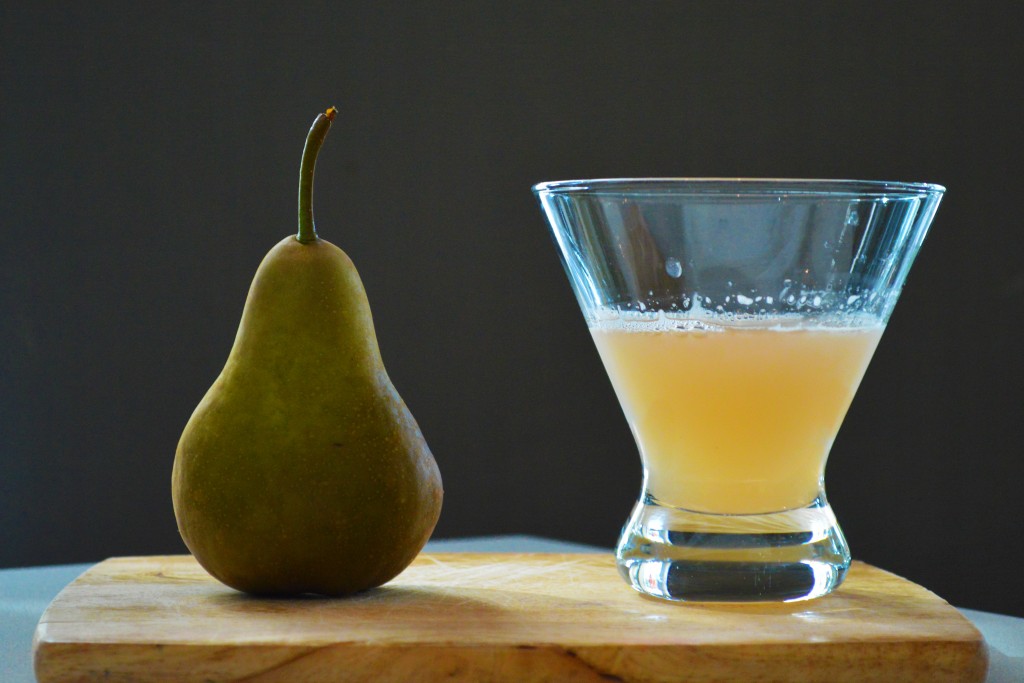
The event will include locally-raised meats, Delta-grown crops such as corn, tomatoes, endive, and, of course pears. The dinner will be catered by Giusti’s Place, a great local restaurant located next to the bridge. An appetizer and cocktail from the Farm-to-Fork Pear Recipe Contest that was held in August will be featured: Grilled Pear Bruschetta from Taste Restaurant and Jay Yoon with Dawson’s Steakhouse at the Hyatt will be serving his House Pressed Bosc Pear Martini (shown below). Delta area wines and local beers will also be served.
Each person will be allowed to reserve no more than four tickets at a price of $125 each. To reserve tickets, please send an e-mail to the California Pear Advisory Board at info@calpear.com. Please note the event is for people over the age of 21.
The California Pear Advisory Board is a non-profit organization made up of farmers who grow pears in California. The cost of Pear Bridge Dinner tickets is meant to cover expenses only. Any money remaining after costs are covered will be donated to a local charity.
If you’d like to try some special pear dishes at local restaurants you can CLICK HERE to find out what’s being served and where.
You can find the California Pear Advisory board on Facebook here, follow them on Twitter here, on Instagram here and on Pinterest here. See you on the bridge on September 27th!
Meatless Mondays: Quick and Easy Roasted Red Pepper Soup
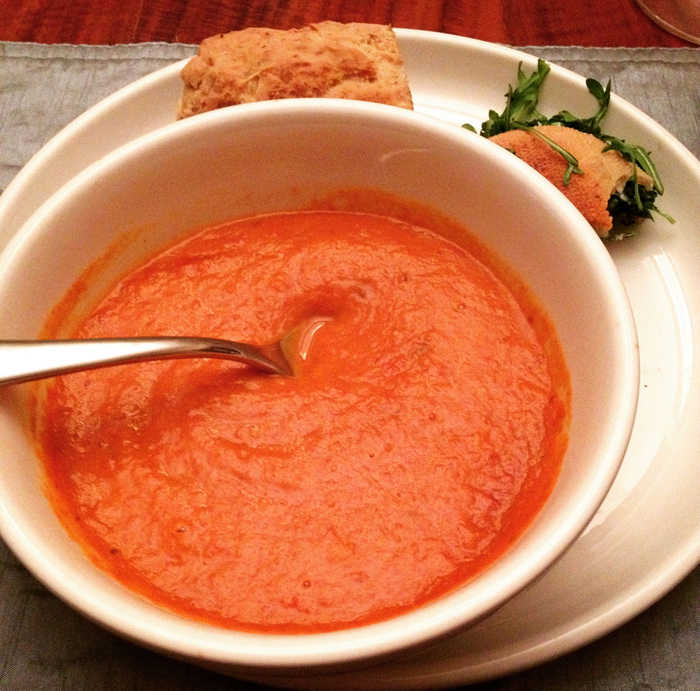
We enjoyed this homemade soup (my own recipe) on Saturday night paired with delicious gluten free and vegan sandwiches from Pushkins Bakery. If you haven’t tried their “adult grilled cheese” or “the buzz”, please do. Both sandwiches are vegan and gluten free and are utterly delicious. It was fun to have a completely vegan meal for a change. 🙂
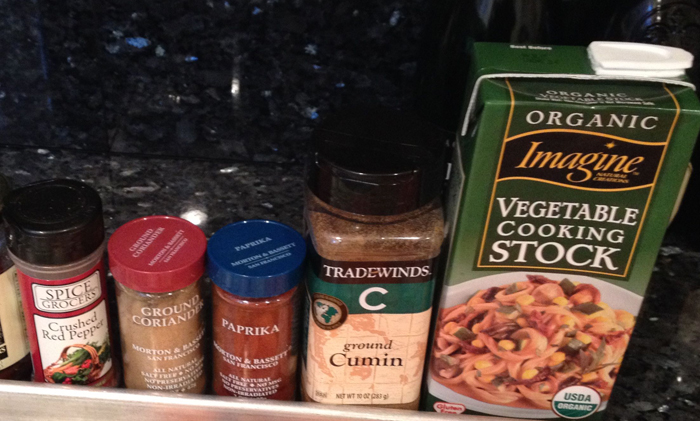
Ingredients:
1 large sweet potato (peeled)
1 large onion
3 to 4 large red bell peppers
1 head of garlic
2 shallots
4 roma tomatoes
1 quart vegetable stock
1 1/2 tsp cumin
1 1/2 red pepper flakes
1 1/2 tsp coriander
1 1/2 tsp paprika
salt to taste
1-2 Tbs olive oil per baking sheet
Procedure:
Preheat oven to 385°F.
Prepare 2 half sheet trays by greasing them liberally with olive oil.


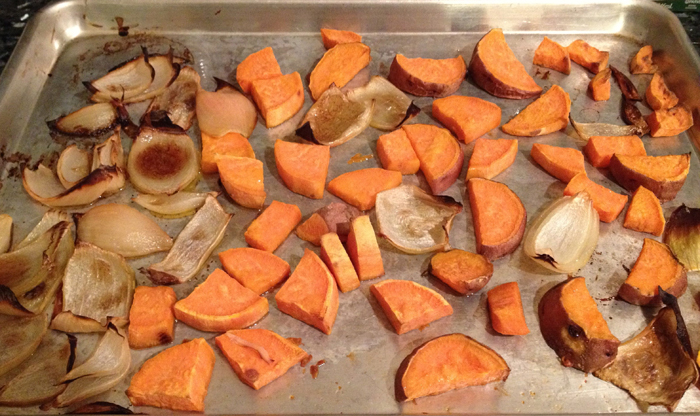
Chop all vegetables into uniform pieces. Place the onion and the sweet potato on one tray. On the other tray, you should be able to fit the chopped tomatoes, peppers, garlic and shallot. Important because the potato and onion will take slightly longer to bake. Bake the vegetables in the oven for about 40 minutes, checking to make sure nothing is burning and rotating them on the pan to prevent burning.
The peppers and tomatoes will be ready to remove from the oven when the peppers blister slightly and the garlic is roasted and tender. From the time you remove the peppers and tomatoes, leave the potato and onion tray in the oven ten minutes longer.

In a blender, begin to blend all the vegetables. There will be more than one blender can hold, so blend a little at a time with the vegetable stock. Since you will be enjoying the soup, add the stock to the consistency you like (I used all but about 1/2 cup of the stock), as thick or as thin. Empty each round of blended vegetables into a very large bowl so that they will mix together.
Then add all of your spices and flavorings. The crushed red pepper, paprika, coriander, and the cumin and salt to taste. Stir the spices in the bowl manually. Then in batches, return the vegetable mixture to the blender and mix until completely smooth. Pour the smooth soup into a new large bowl.
This soup can be made up to a day ahead of time. Just simply ladle into serving bowls and reheat. I’m confident this will be one of the easiest, yet most tasty soups you will ever make! 🙂 We paired the soup with a 2011 Handley Pinot Noir, Anderson Valley and a 2012 St. Rey Celeste, Candyhill Vineyards (Revolution Wines).

Celebrate Thanksgiving with Sweet Potato Latkes and Beaujolais Nouveau!

Thanksgiving 2014. Last week, Andy and I celebrated a little early because we will be in Mexico for the actual holiday, and I couldn’t resist making something special to pair with Georges Duboeuf’s new release of Beaujolais Nouveau—the inveterate red wine made from Gamay grapes produced in the Beaujolais region of France, that is only fermented a few weeks before being released for sale annually on the third Thursday of November.
Retailing at $10.99 nationwide, the 2014 Georges Duboeuf Beaujolais Nouveau complements an abundance of holiday dishes, from savory roasts to cranberry sauce. Suggested serving temperature for the Nouveau is between 62°F – 66°F, which is just slightly cooler than room temperature, to enhance the aromas and fruit flavors.
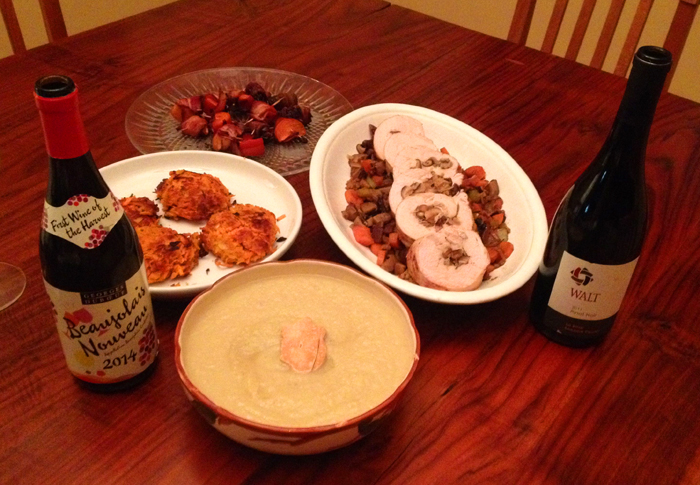
Our spread included:
turkey roulade stuffed with shitake mushrooms, shallots, chorizo and bacon, on a bed of carrots, celery, mushrooms and onions

cauliflower and leek soup with a gluten free shortbread (did not take a closer image, snap!) 😉
sweet potato latkes

bacon wrapped persimmons and bacon wrapped dates

2014 Georges Duboeuf Beaujolais Nouveau
Thanks to Georges Duboeuf for providing the bottle of Beaujolais!
Now the recipe for the latkes—skip the sweet potato casserole and give these a shot!
Sweet Potato Latkes
Ingredients:
3 sweet potatoes
1 yellow onion
2 eggs
2 tsp salt
2 tsp baking powder
1/4 cup coconut flour
1 cup coconut oil (melted)
Procedure:
Preheat oven (425°F)
Peel sweet potatoes and grate them, using the large holes on the grater, into a large bowl—I cheat and use a food processor on the shredder setting.
Grate the onion, too. Then, squeeze out as much liquid from the potatoes as you can and then add the grated onion to the bowl with the potatoes.
Add all other ingredients and combine. Using your hands works best, so keep a towel nearby or work close to the sink.
Prepare two baking sheets by pouring melted coconut oil on them and coating the entire tray.
Then form the potato mixture into 4-inch (or so) discs and place on the baking sheets until you have filled them up.
Brush the tops with a little melted oil and bake to desired crispness. I recommend checking on them and flipping them midway through baking to get both sides crispy.
Remove from oven and drain on paper towels prior to plating/serving.
ENJOY!! Happy Thanksgiving 🙂
Gluten Free Chocolate Chip Cookie Dough
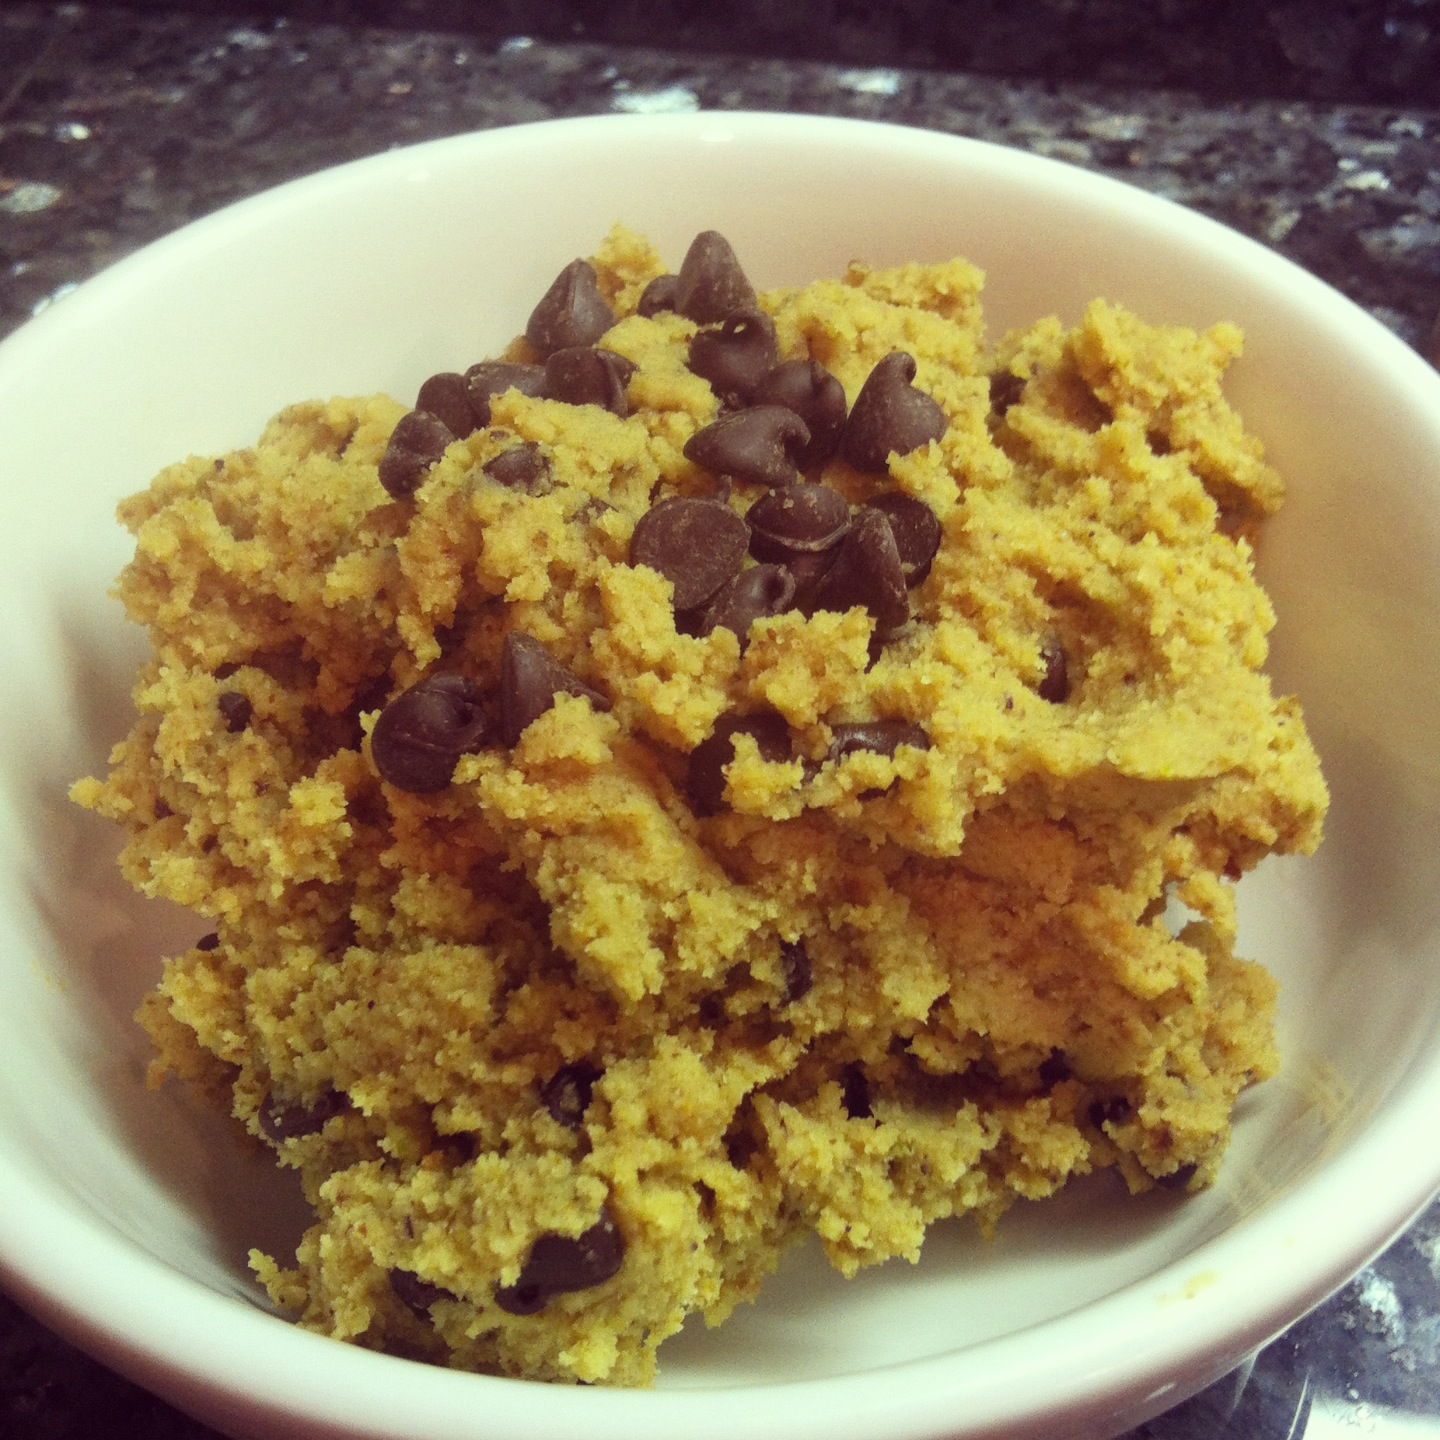
I have a problem. It’s this recipe I invented for cookie dough. It’s addictive and I have had it, ahem… for breakfast the past two three days. But only a little bit at a time, with fruit. I swear. Can’t. Stop. Eating it.
You don’t bake it. You just eat it. You know, like you would straight out of the tube an institutional-sized tub. Sigh. Yes, because it’s way easier to stick your face in a vat of dough than it is to actually have to measure ingredients and use any muscle at all to stir it around in a bowl. I know you are stronger than me and none of you have ever purchased this product or eaten it only by candlelight the light from the fridge on your face at midnight. 😉
Anyway, to avoid the sugar, wheat and all the unnatural ingredients that cookie dough normally contains, I came up with this recipe over the weekend (as I was making a recipe from OMG it’s Paleo? called 5 Ingredient Avocado Pudding.) I made the pudding with the idea that Andy and I would use it as a dip for bananas and apples. The recipe called for chocolate chips, and it made me think of chocolate chip cookie dough and a possible recipe for that… we could dip the fruit in that, too! Oh joy!
The secret in the cookie dough is Mehjool dates. They’re probably one of my biggest indulgences (60 calories apiece!). Not only do they give the dough sweetness, they also provide a molasses/caramel flavor. And, for diehard Paleos, I have made it two ways. Some people don’t believe in using butter at all, some people don’t eat any legumes at all. I myself, enjoy organic garbanzo beans once in a while. So, review the recipes below and tailor them to your own needs. 🙂 Each one serves 2-4 people. Enjoy.
PS: You’ll need a food processor for this one. Puréeing dates is tough on the forearms. 😉
Recipe One: Paleo Version
Ingredients:
5-6 pitted dates (chopped)
3/4 cup toasted almonds
1 Tbs coconut oil
2 tsp vanilla
3 Tbs honey
1/3 cup So Delicious unsweetened coconut milk
1/3 cup coconut flour
pinch salt
1/2 cup dark chocolate chips or chunks (this brand is great!)
Procedure:
Pulse the almonds in the food processor until they are a fine meal consistency, then add the coconut oil. Process until the mixture turns into almond butter, then add the chopped dates, honey, the vanilla and the salt. Then remove the mixture and transfer into a small bowl. Add the coconut flour and some coconut milk until the dough is the consistency you like. Then stir in the chocolate chips. Refrigerate until you are ready to eat. OK, I’m ready. What about you? 🙂
Recipe Two: Primal Version
Ingredients:
5-6 pitted dates (chopped)
1/2 cup toasted almonds
1/2 cup organic garbanzo beans
2 Tbs greek yogurt (I use 0% fat)
2 packets stevia
1 Tbs grass fed butter
2 tsp vanilla
1/3 cup coconut flour
pinch salt
1/2 cup dark chocolate chips or chunks
Procedure:
Pulse the almonds in the food processor until they are a fine meal consistency, then add the butter. Process until the mixture turns into almond butter, then add the garbanzo beans, the greek yogurt, the stevia, the vanilla and the salt. Then remove the mixture and transfer into a small bowl. Add the coconut flour and some coconut milk until the dough is the consistency you like. Then stir in the chocolate chips. Refrigerate until you are ready to eat! As I stated earlier, I love to use the dough as a dip for apples, but you can form into little pieces and use as a topping for Greek yogurt or as a treat on ice cream. There are also plenty of recipes out there in the paleosphere for “paleo” ice cream using coconut milk. Here’s one from PaleoOMG 🙂
Primal-Friendly Gluten-Free Bleu Cheese Pecan Bread
If you never make anything else from this website, make this recipe. It is a spin on an old recipe I used to make called “crack bread”. I call it that because it will turn you into an addict. 😉 If you don’t mind eating wheat or sugar, you can look up & make the old recipe here. If you’re ready to have an amazing Primal-friendly meal, (with way less calories) read on:
I came up with the old recipe after tasting an appetizer called Billy Blue Bread at The Owl Grill in Grass Valley. It’s still on the menu there, but since I have cut wheat and sugar from my diet, I wouldn’t dare indulge. Instead, I tweaked my old recipe to make it gluten free and so that no added sugar is necessary! I even ditched the butter in the new recipe and replaced with with an onion “jam” of sorts. There’s so much flavor in the onion “jam”, you won’t miss the butter.
Special products I used in this recipe include Extra Virgin Olive Oil (everyday variety) made by California Olive Ranch and Pamela’s Products Gluten Free Artisan Flour Blend. I’d like to thank both companies for sending me product samples. If you want to be truly primal, you can leave out the gluten-free flour blend (it contains rice), but I recommend leaving it in the recipe to help give your bread a better texture. It’s a really great product.
Primal-Friendly Gluten-Free Bleu Cheese Pecan Bread with Balsamic Reduction
Before you begin, you’ll want to line a baking sheet with parchment paper, and toast and chop your pecans so they are both ready to use. Also, if you don’t want to hassle with making a balsamic reduction, there are several you can buy to use instead.
For the Cauliflower Bread
2 heads of cauliflower
4 eggs
4 egg whites
1/3 cup almond meal
1/4 cup Pamela’s Products Gluten Free Artisan Flour Blend
1 Tbs California Olive Ranch Olive Oil
pinch salt
Prepare: Preheat oven to 375°. Cook cauliflower either by boiling it or microwaving until it is almost falling apart. Allow to cool and then place in a food processor. Pulse the cauliflower with the eggs until completely smooth. Transfer the mixture to a large mixing bowl and add the almond meal, the flour blend, and salt. Stir until completely blended and spread on a parchment lined baking sheet. Bake in oven until golden brown and bread has set completely. (About 30 minutes). While bread is in the oven, you can prepare the onion jam.
For the Onion Jam
3 large red onions
1-2 Tbs olive oil (I used California Ranch Olive Oil)
1 tbs minced garlic
2 tbs balsamic vinegar
pinch salt
Slice onions and sauté in 1-2 Tbs olive oil. Add the salt. When the onions turn translucent, add the balsamic vinegar. Continue cooking slowly until onions caramelize, then add the garlic at the end. Incorporate fully until the onions are cooked. This should take about the same time the bread will take to bake. When the onions are finished, allow to cool a bit and then place them in a food processor. Pulse the mixture until it turns into a paste or “jam”. Set aside. At this point, the bread should be ready to remove from the oven. Now you’re ready to make the balsamic reduction.
For the Balsamic Reduction
2 1/2 cups balsamic vinegar
In a saucepan, heat the vinegar until it is simmering and reduce it until it is the consistency of molasses. This will take about 20 minutes. You will be looking for something thick and viscous that will stick to the back of a spoon.
For the Finished Product
3/4 cup bleu cheese crumbles
1 cup chopped toasted pecans
Keep oven temperature at 375°.
Spread the onion jam over the bread, and top with 3/4 cup crumbled bleu cheese crumbles, then sprinkle the pecans over that.
Place bread back in oven, and bake for 10 minutes, allowing the cheese to melt. Remove from oven and allow to cool slightly. Then, drizzle the reduction over the bread. Serve immediately with a big glass of merlot! 🙂 Also, I really enjoy dipping the bread in the Arbequena variety of oil that California Olive Ranch makes.
You can find California Olive Ranch on Facebook here and on Twitter here. Pamela’s Products Facebook page is here and follow them on twitter here.
Grilled Monkfish Medallions with Mustard featuring Tazah Extra Virgin Olive Oil
Today’s recipe is from The New York Times Wine Club website and was brought to you by the makers of Tazah Extra Virgin Olive Oil. We were introduced to Tazah at the Winter Fancy Food Show in San Francisco. Andy coordinated the product sample at the show, picked the monkfish recipe, and even prepared it for us. I didn’t have to do anything but smile and pose with the bottle of Tazah Extra Virgin Olive Oil. Sometimes I have it pretty easy. The recipe is fantastic and Tazah Extra Virgin Olive Oil is versatile enough to use in a recipe and also use in a salad dressing (which we also did the very same evening).
One of the photos is the monkfish with the marinade, and the finished plate includes one of our favorite sides: parsnip chips, sautéed eggplant (both prepared with Tazah Extra Virgin Olive Oil, and a garnish of kiwi. I was really impressed with Andy’s cooking (he’s above average to start, especially when preparing meat, but this time was a real treat!!). The meal turned out so great! The flavor component that is key is the orange zest. It really amplifies the flavor of the sauce.
To make this recipe completely paleo you can use coconut aminos in place of the soy sauce.
Grilled Monkfish Medallions with Mustard
Ingredients
3 tablespoons Dijon mustard
1/3 cup orange juice
1 teaspoon soy sauce
2 tablespoons extra-virgin olive oil
Salt and freshly ground black pepper to taste
6 thick slices of monkfish, each about 6 ounces
1 medium onion, finely chopped
Grated zest of 1 orange
Directions
Combine the mustard, orange juice and soy sauce with 1 tablespoon of the olive oil. Beat well. Season to taste with salt and pepper.
Place monkfish in a glass or ceramic dish and pour 6 tablespoons of mustard mixture over fish, turning each piece to coat both sides. Set aside at room temperature.
Preheat a grill or broiler.
While the grill is preheating, place the remaining olive oil in a small skillet over medium heat. Add the onion and sauté until golden. Stir in the grated orange zest and the remaining mustard mixture. Remove from the heat and set aside.
Grill or broil the monkfish 3 to 4 minutes on each side, until lightly browned. Briefly reheat the sauce to a simmer, stir it and spoon it over the fish.
For more information on Tazah, you can call (323) 664-8956 and find them on Facebook here.